1 Introduction
Although there is an unofficial .deb package to install Spotify in Debian-based distributions (See here: https://www.spotify.com/us/download/linux/), there is a lighter alternative that uses less resources.
This post aims to be a guidance for those seeking to run a lightweight Spotify client, from the terminal, in Linux. Before we move on:
- Disclaimer #1:
This method only works for Spotify premium accounts
- Disclaimer #2:
We are going to build sofware from source. If you are fine using
snap(shipped by default with Ubuntu but not with Linux Mint), you probably want to check that road. I don’t particularly likesnap, so I’m not using it here.
2 Overview
We are going to install two applications, both written in Rust: spotifyd and spotify-tui. The former is the Spotify engine, i.e. it connects to Spotify servers to retrieve the music, while the later is the text user interface (hence the name, “tui”).
Think of them as the back-end (spotifyd) and the front-end (spotify-tui) of any application.
Most of the material presented here is condensed in this YouTube video by Brodie Robertson and in the documentation available in spotifyd and spotify-tui GitHub repositories.
This notes were mainly for my future self, but then I decided to create a post. The overall goal is to elaborate on some tricky details of the installation process.
3 Installing spotifyd
spotifyd is a Unix daemon and is already available to install as a package in Arch, macOS and as a snap package.
We are not going to use any of these, instead we are going to build it from source. If you have never heard about building from source, I recommend this video to learn more: https://www.youtube.com/watch?v=atSZAbyrjxU
Spotifyd’s GitHub page comes in handy for the installation. I’m going to copy-paste the commands there with some comments below:
- Check if you have Rust and cargo installed (cargo is the Rust package manager). If you get nothing from the commands, then you don’t have them installed.
rustc --version # check rust
cargo --version # check cargo- Install the requirements (apart from Rust and cargo you will need other libraries). Depending on your Linux distribution you will need different libraries; check which here. Next, clone the repository using
gitin you/homedirectory
# install dependencies for Debian-based (Mint, Ubuntu)
sudo apt install rustc cargo libasound2-dev libssl-dev pkg-config

# clone spotifyd's repository
git clone https://github.com/Spotifyd/spotifyd.git- The
cargo buildcommand below will build files from the source code we downloaded from GitHub. These files are called binares. Thecargo installcommand will install these binaries into the system.
cd spotifyd # enter into the folder we cloned from GH
cargo build --release # build binaries from source code
cargo install --path . --locked # install binaries- Go to
~/.configfolder. Create a folder namedspotifydand inside this a filed namedspotifyd.conf. You will need to fill this file in as explained in the next section.
cd ~/.config # move to .config folder
mkdir spotifyd # create spotifyd folder
nano spotifyd.conf # create spotifyd.conf file
3.1 The spotifyd.conf file
This file deserves special attention and in my personal experience this was were I needed more help.
There is an entry for the spotifyd.conf file in the installation guide, but keep in mind not all entries can co-exist at the same time. I copy-pasted the file as it is, filled in with my account details and removed some lines.
This is how my spotifyd.conf looks like (except for username and password):
[global]
# Your Spotify account name.
username = "username"

# Your Spotify account password.
password = "password"

# The audio backend used to play the your music. To get
# a list of possible backends, run `spotifyd --help`.
backend = "alsa"

# The alsa mixer used by `spotifyd`.
mixer = "PCM"

# The volume controller. Each one behaves different to
# volume increases. For possible values, run
# `spotifyd --help`.
volume_controller = "alsa"  # use softvol for macOS

# The name that gets displayed under the connect tab on
# official clients. Spaces are not allowed!
device_name = "lenovo"

# The audio bitrate. 96, 160 or 320 kbit/s
bitrate = 160

# If set to true, audio data does NOT get cached.
no_audio_cache = true

# Volume on startup between 0 and 100
# NOTE: This variable's type will change in v0.4, to a number (instead of string)
initial_volume = "90"

# If set to true, enables volume normalisation between songs.
volume_normalisation = true

# The normalisation pregain that is applied for each song.
normalisation_pregain = -10

# The displayed device type in Spotify clients.
# Can be unknown, computer, tablet, smartphone, speaker, t_v,
# a_v_r (Audio/Video Receiver), s_t_b (Set-Top Box), and audio_dongle.
device_type = "computer"
3.2 spotifyd.conf parameters breakdown
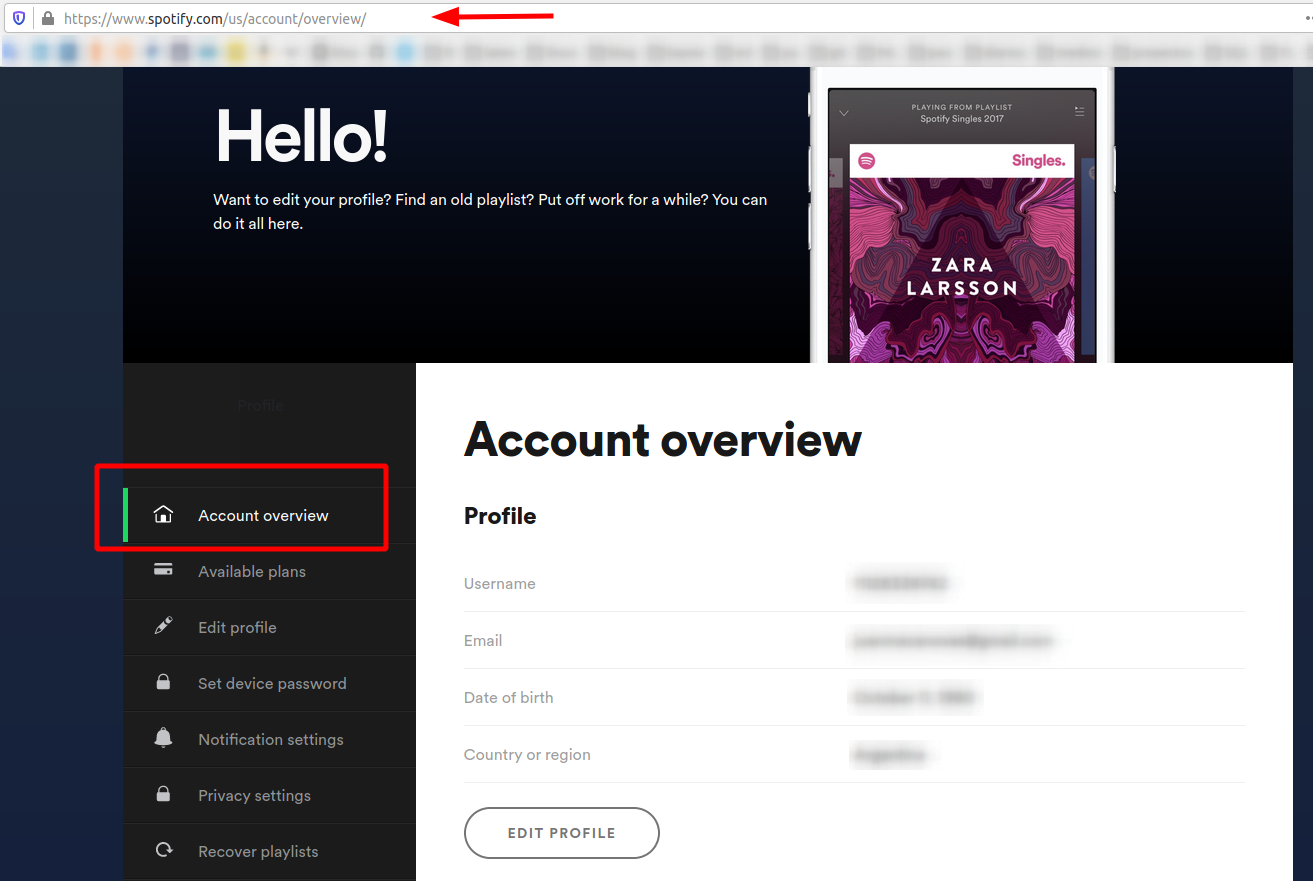
username: You can get you Spotify username in the “Account Overview” section from this page: https://www.spotify.com/us/account/overview/
password: Here I’m hardcoding my password into the spotifyd.conf file. If you don’t feel like doing so, there are other alternatives. See Brodie Robertson’s video in minute 5:30 and Alternatives to storing your password in the config file section from documentation.
backend: There are several audio back-ends (alsa, pulseaudio). As per documentation, you can check available back-ends by running spotifyd --help in the terminal. In my system (LM 20.1), the available back-end is alsa.
device and control: I had to remove these parameters from my config file but I’m not sure why. While having them in the config file, everything seemed to work (spotify-tui was playing the songs) but the computer was mute; not sound at all. Once I removed them, sound was loud and clear.
on_song_change_hook: This optional parameter executes a command in your shell after each song changes. For example, Brodie Robertson’s video shows how to display a notification in minute 7:15
The remaining parameters are easier to understand.
4 Installing spotify-tui
After installing spotifyd we need spotify-tui. The challenge here was spotify-tui build was failing because some Linux libraries were missing. In my system (Linux Mint 20.1 Ulyssa) these were:
# install required libraries to build spotify-tui
sudo apt-get install libxcb-shape0-dev libxcb-render-util0-dev libxcb-xfixes0-dev
Once the requirements are done, we’ll use cargo again:
cargo install spotify-tui Lastly, you’ll need to add /home/usr/.cargo/bin to your $PATH, where usr is your system’s user name. For example, I included the following line in the .bashrc file located in /home/jm.
# spotify-tui
export PATH="/home/jm/.cargo/bin:$PATH"
4.1 Setting spotify-tui up
spotify-tui needs to connect to Spotify’s API in order to find music by name, play tracks, etc. The instructions on how to set this up are the following (taken from spotify-tui’s GitHub repository):
Log in to the Spotify dashboard
https://developer.spotify.com/dashboardClick “Create an app” and set a name and a description. You now can see your
Client IDandClient Secret
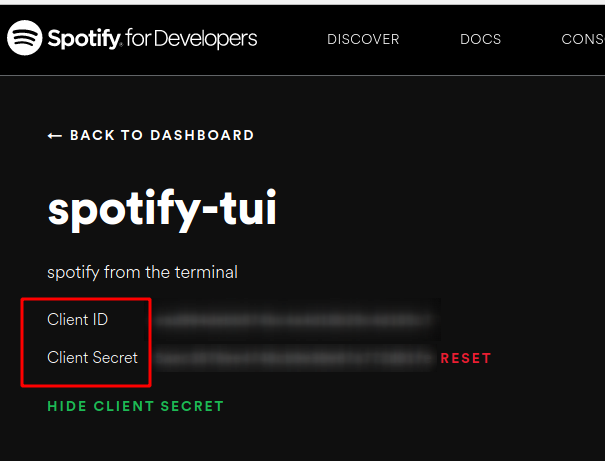
- Now click “Edit Settings”
- Add http://localhost:8888/callback to the Redirect URIs
- Scroll down and click Save
- You are now ready to authenticate with Spotify!
- Go back to the terminal
- Run
spt - Enter your
Client ID - Enter your
Client Secret - Press enter to confirm the default port (8888) or enter a custom port. I used the default port.
- You will be redirected to an official Spotify webpage to ask you for permissions.
- After accepting the permissions, you’ll be redirected to localhost. If all goes well, the redirect URL will be parsed automatically and now you’re done. If the local webserver fails for some reason you’ll be redirected to a blank webpage that might say something like “Connection Refused” since no server is running. Regardless, copy the URL and paste into the prompt in the terminal.
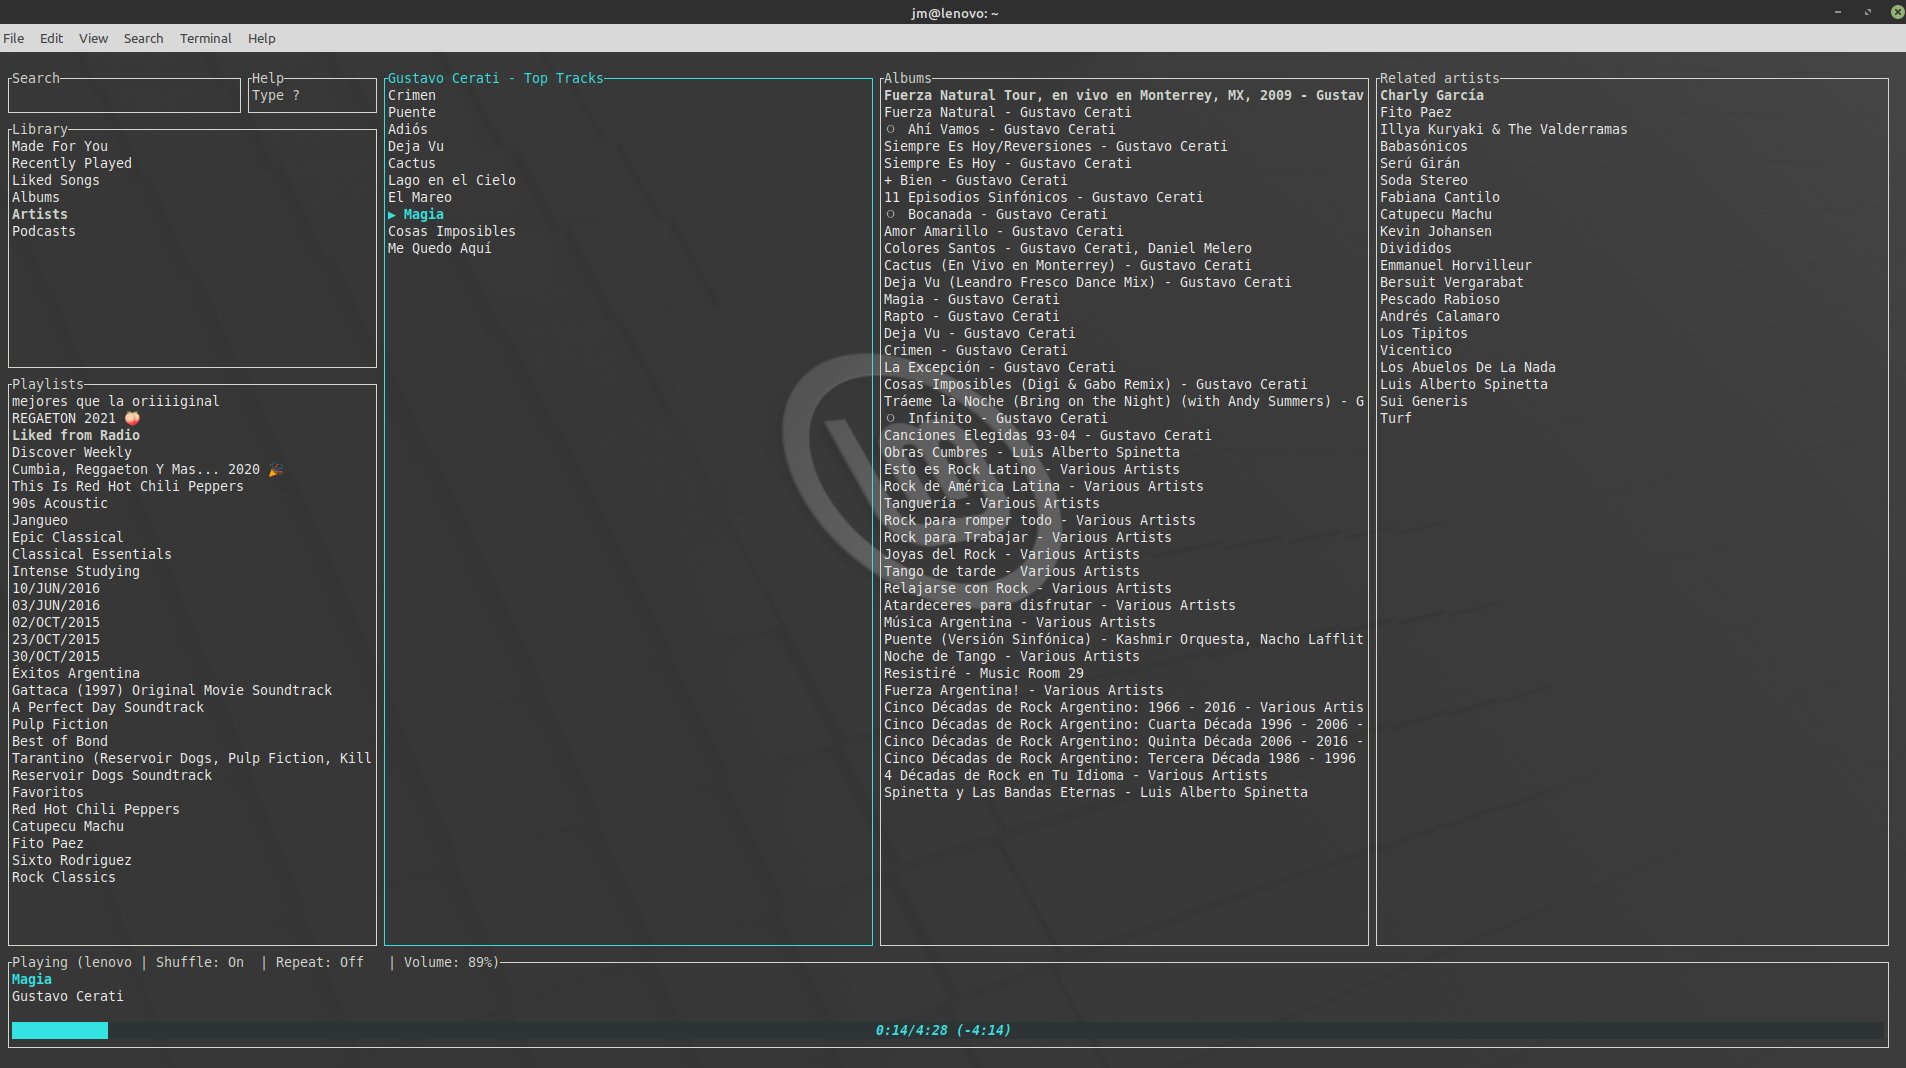
5 Usage
Whenever you want to launch Spotify, open a terminal and run:
spotifyd
spt
6 References
YouTube video by Brodie Robertson
https://www.youtube.com/watch?v=R5jikGfSdh4spotifyd’s GitHub repository
https://github.com/Spotifyd/spotifydspotifyd’s GitHub page
https://spotifyd.github.io/spotifyd/Introduction.htmlspotify-tui’s GitHub repository
https://github.com/Rigellute/spotify-tui